From my beloved childhood home to a totally reimagined space – here’s the full story of our extreme DIY kitchen renovation and how we turned the kitchen I grew up in into the kitchen of my dreams. If you love a good before & after home interior transformation, you’re in the right place!
**All links and sources can be found at bottom of post!**
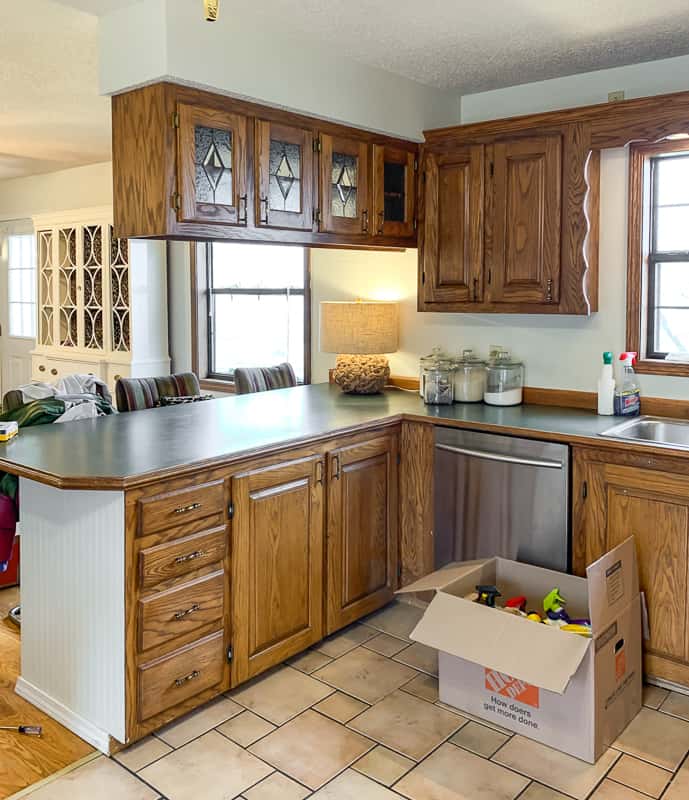
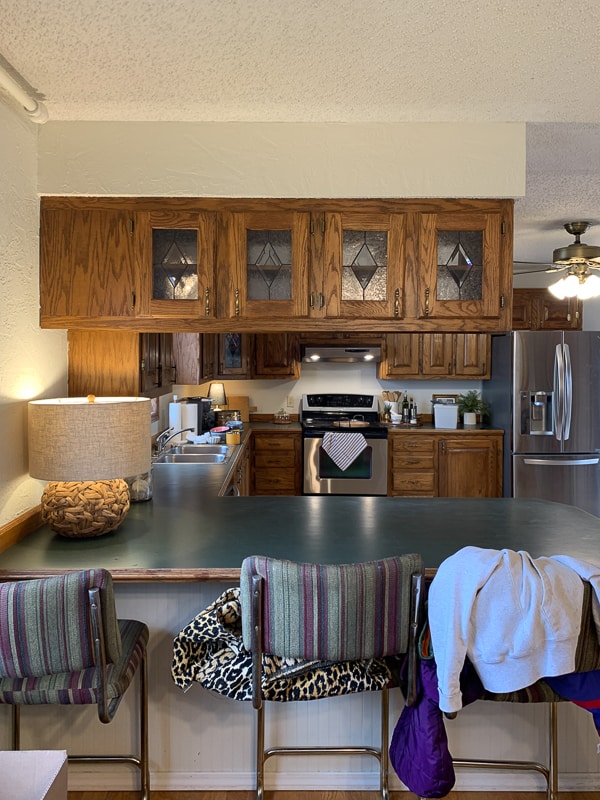
The Kitchen I Grew Up In
There’s something incredibly nostalgic about the space where you grew up. For me, that space was this kitchen. It was the heart of my childhood home.
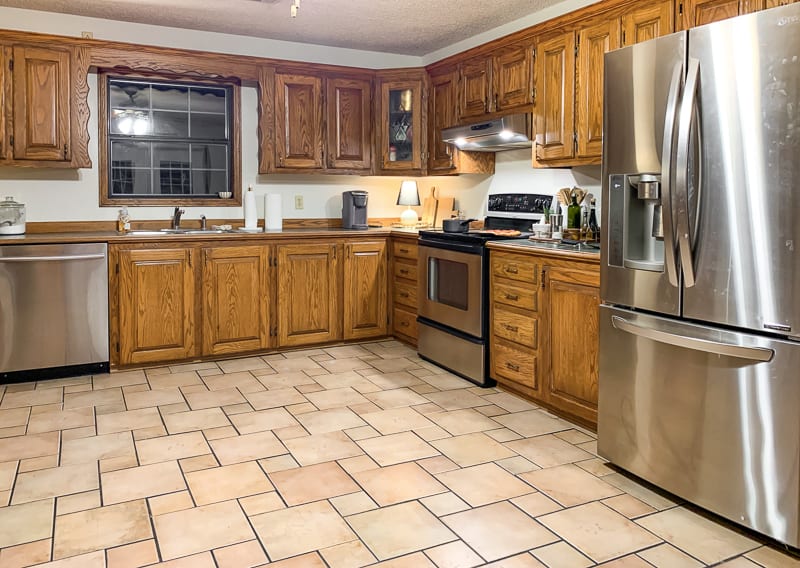
But when my husband and I bought this house from my parents in 2021, I knew one day I’d give the kitchen a totally new look.
Giving it a new look actually started shortly after we moved in.
We weren’t ready to do a major renovation at first. However, I did not want to live with the dark cabinets and popcorn ceiling a second longer than I had to.
So I did a mini update to keep myself from going insane. You can read more about it in this post!
Here’s the kitchen after the mini update.
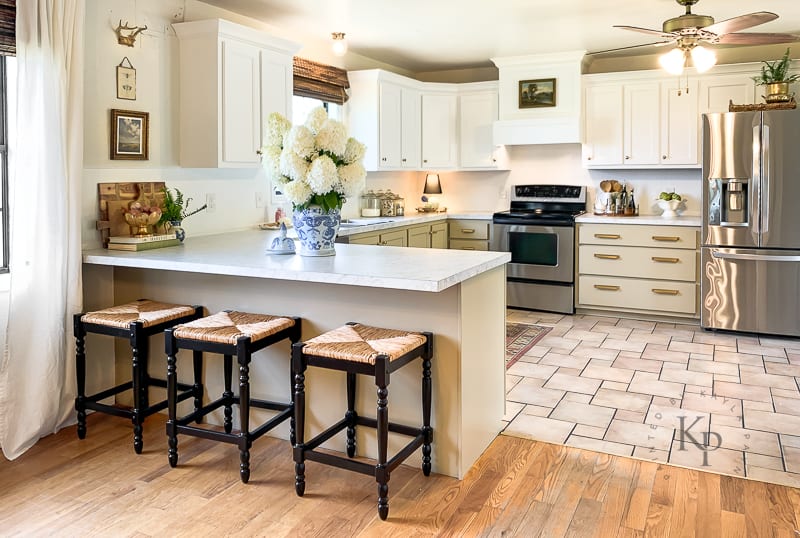
It really didn’t take too much money to make the kitchen look completely new and fresh!
But, this was always intended to serve as a bandaid until we could do an extensive remodel on the entire home.
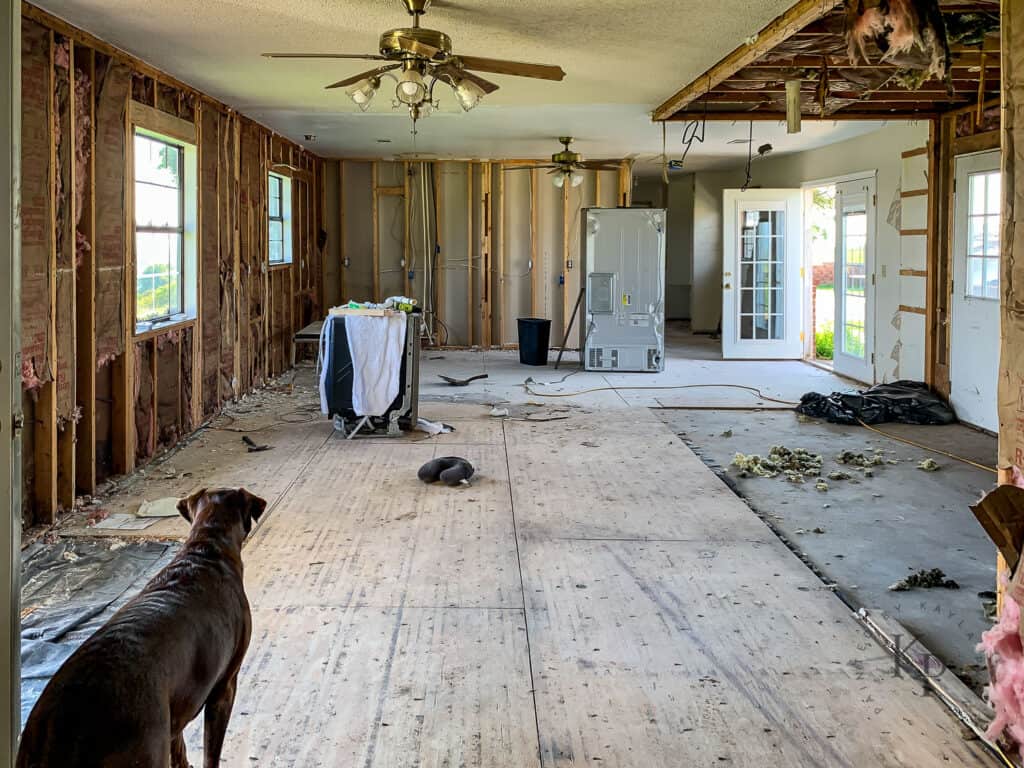
The Real Renovation Begins
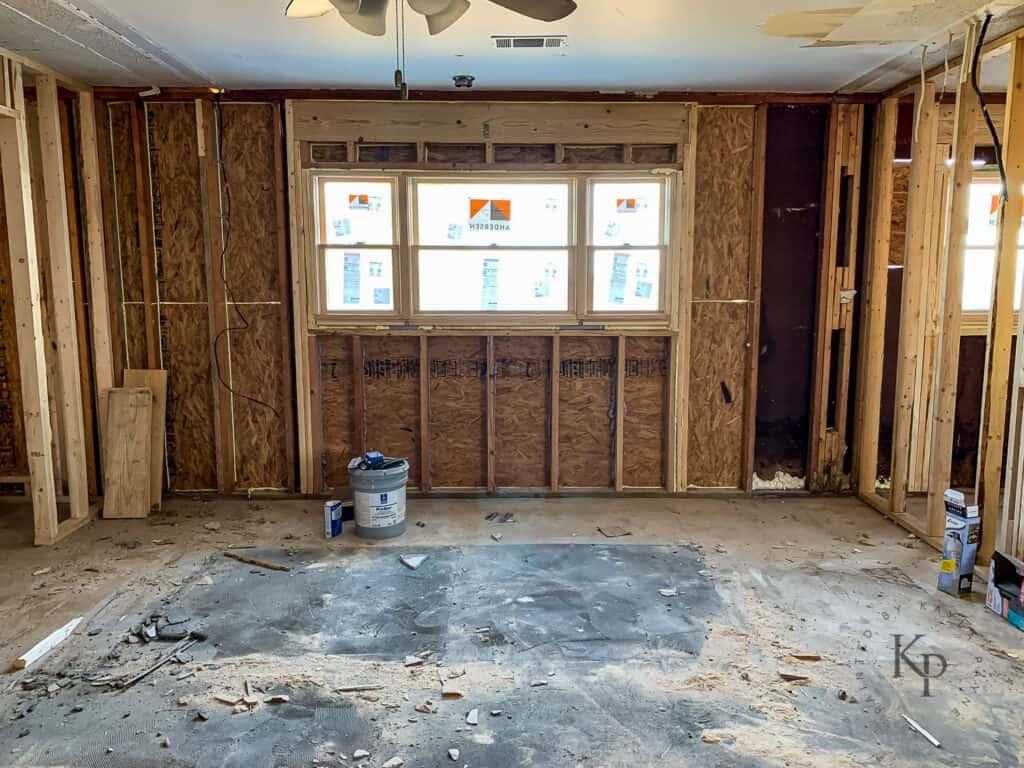
In late summer of 2022, we embarked on a full home gut renovation. Most of the rooms went down to studs.
While the space was opened up, we updated the plumbing and electrical throughout the entire house.
Watch Episode 1 of our kitchen renovation here!
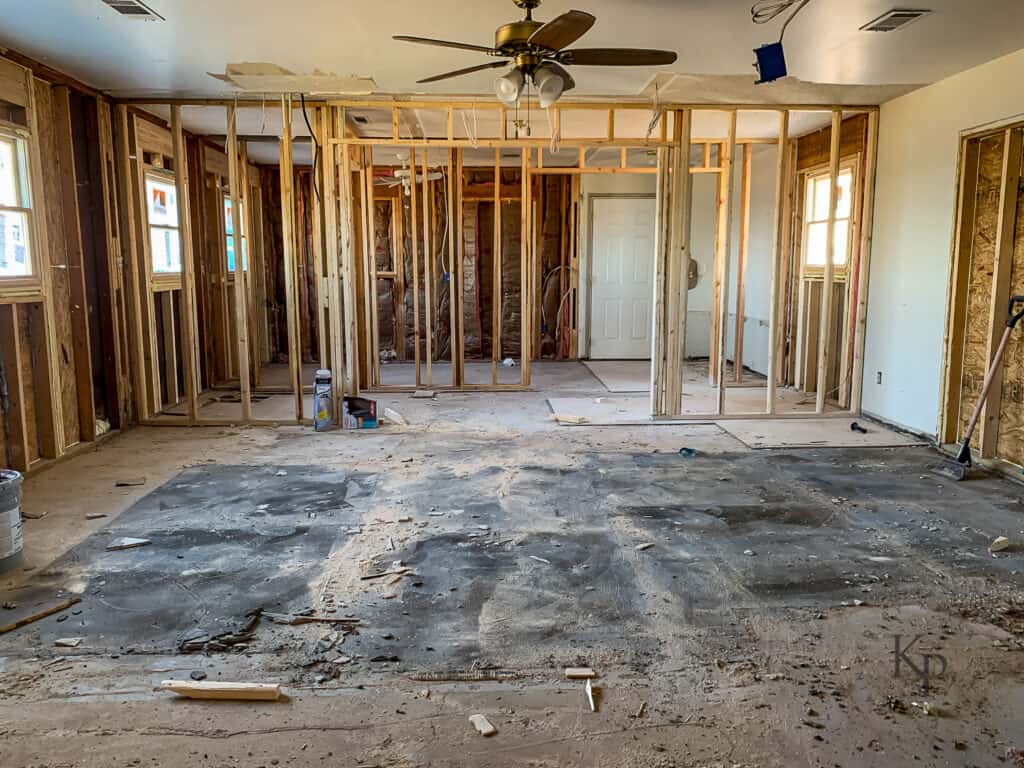
The Vision: A Total Overhaul
Once the space was cleared of all the old, it was easier to imagine what the new layout could be.
I spent a lot of time standing in the empty space in silence just thinking of how I wanted the new kitchen to look and function. Spoiler: I actually didn’t spend quite enough time thinking about the functionality as I wish I would’ve. I definitely focused more on how it would look.
I gravitate toward symmetry in almost all of my designs. This space was no different. I basically laid out the design to be perfectly symmetrical – even at the cost of what would-be great functionality. But I’ll get into things I regret later on!
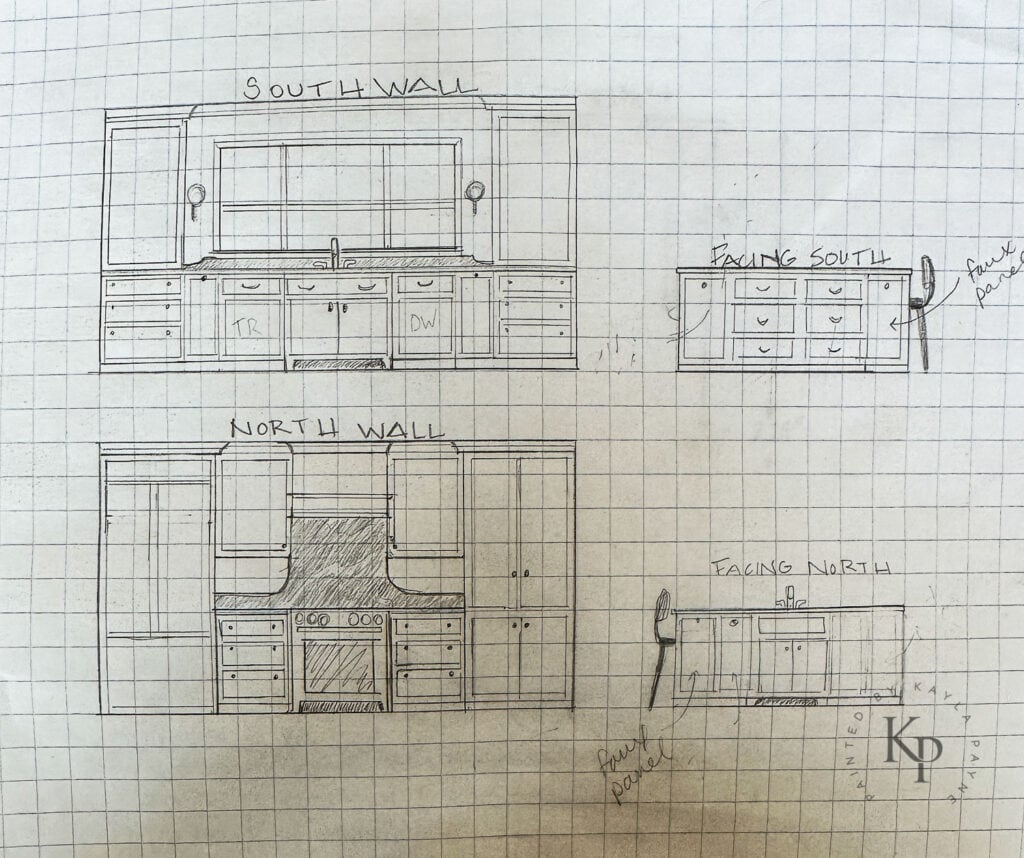
We bought RTA (ready to assemble) cabinets in order to save money on the project. After researching RTA cabinet companies, purchasing from Cabinet Joint was a no-brainer.
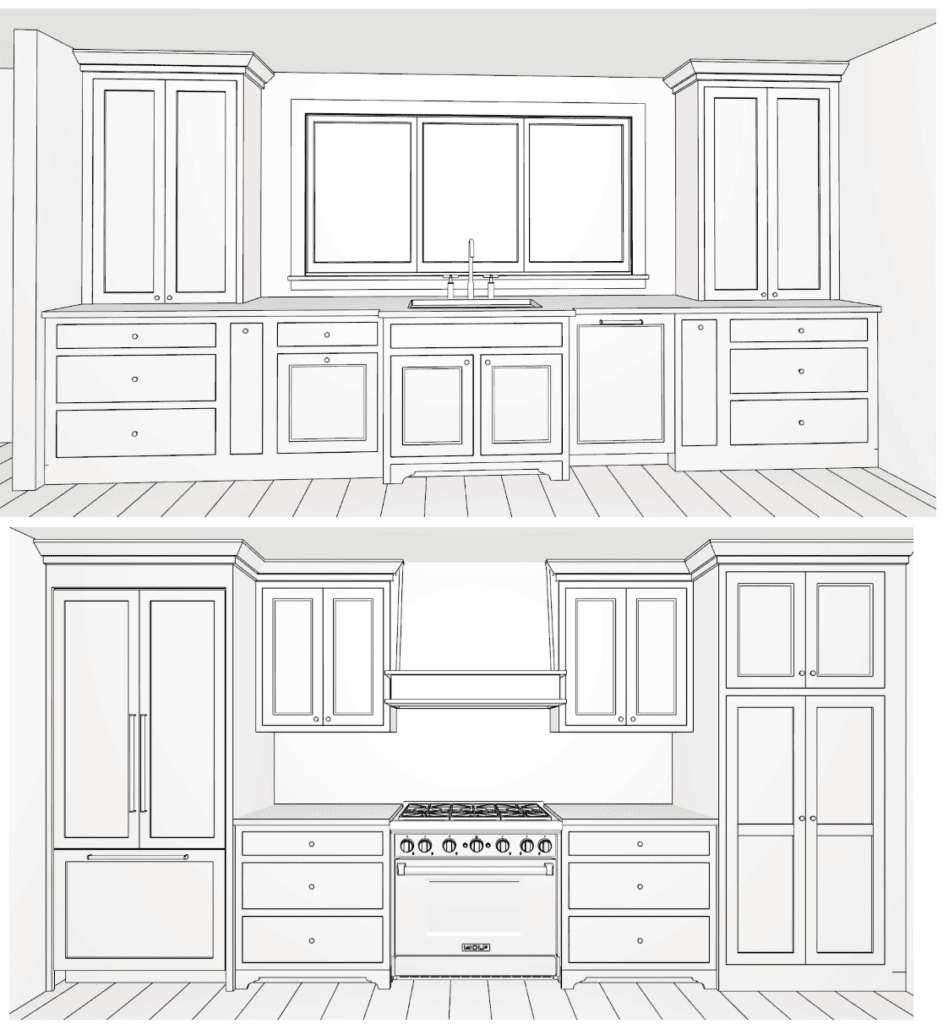
Here’s my hand drawing of what I submitted to Cabinet Joint and the renderings they sent back to me.
I LOVED seeing their renderings for the first time! It was amazing to see to-scale accurate images of what I had envisioned.
The Kitchen Mood Board
How I wanted the kitchen to feel/look:
- High end
- Sophisticated
- Collected
- Warm
- Inviting
- Unexpected
- Elegant
- “Old money”
- Glossy
- Traditional
- Tailored
- Chinoiserie
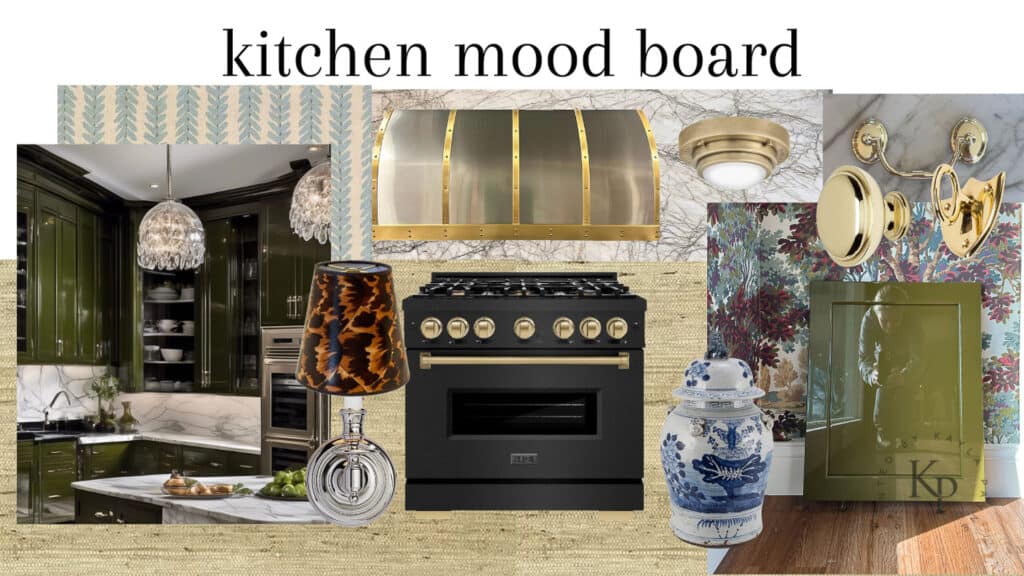
This was the mood board I created (using Canva) to help get some of my ideas out of my head to visualize. If you create a mood board in the beginning, you can use it as your “north star” when making design decisions along the way.
Taking Shape
The drywall stage is one of my favorites! I could finally get a better sense of the whole space. It’s so crazy how everything looks so much bigger once the drywall is installed!

So after the drywall was up, I finally got accurate measurements for the cabinetry, finalized the cabinet design/placement tweaks then placed my cabinet order from Cabinet Joint.
While waiting on the cabinet package to arrive, the finish carpenter installed the window casing and trim, door jambs and the baseboards.
Then I prepped, primed and painted the trim, walls and ceilings.
Cabinet Delivery Day
The day our cabinets arrived was so exciting! FedEx Freight carefully delivered 7 pallets to our doorstep. I documented the process by taking photos of the pallets just like Cabinet Joint instructed (in case there was any damage).
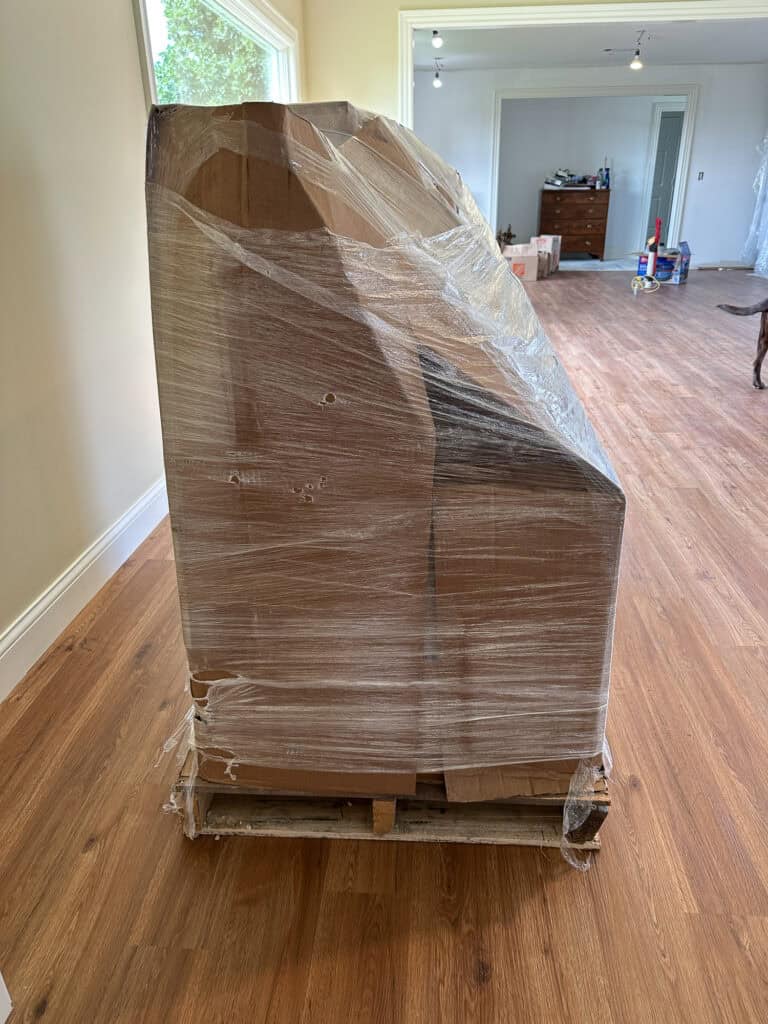
I was so grateful that Cabinet Joint had clear instructions on exactly what to do in preparation for your order in their email correspondence and in this YouTube video.
Since we were first timers, it was so nice that they clearly defined what to do and what to expect!
Luckily, nothing arrived damaged so we were able to carry everything into the house and get right to work assembling.
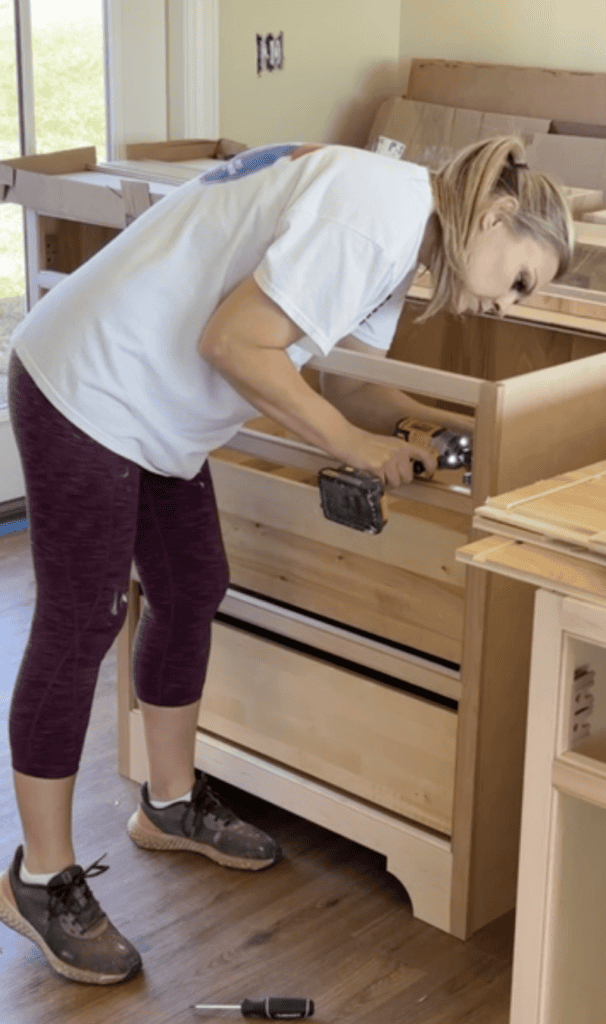
Assembling and Installing Our RTA Cabinets From Cabinet Joint
I was a little nervous to begin the assembly process. It’s easy to let yourself get overwhelmed if you think of the entire project all at once. To keep my mind from running crazy and getting too overwhelmed, I took it one box at a time.
It took me less than 2 weeks to fully assemble all of the cabinets. I worked on it mostly alone – my husband helped me with a few of the large size cabinet boxes in the evenings after work. But I was fully capable to assemble everything on my own. It was not difficult at all.
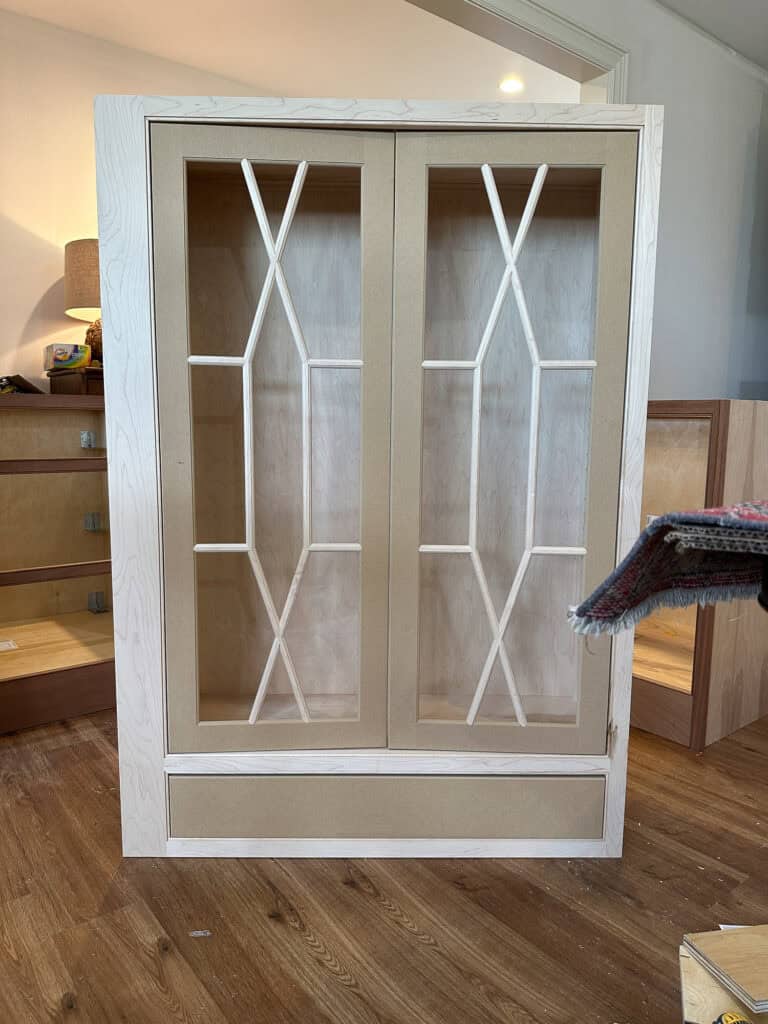
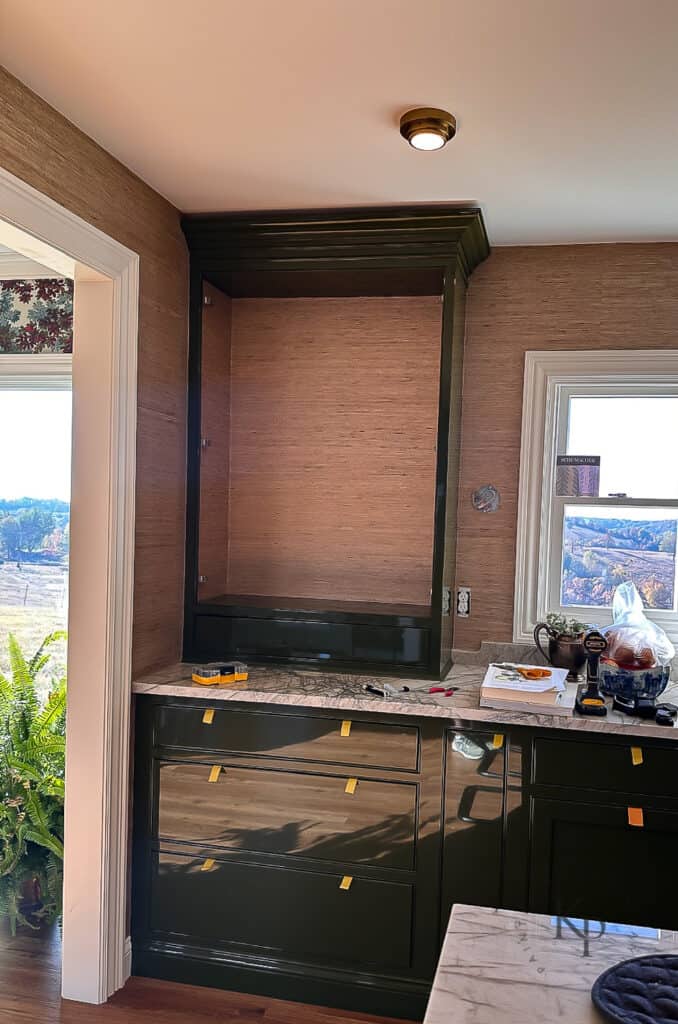
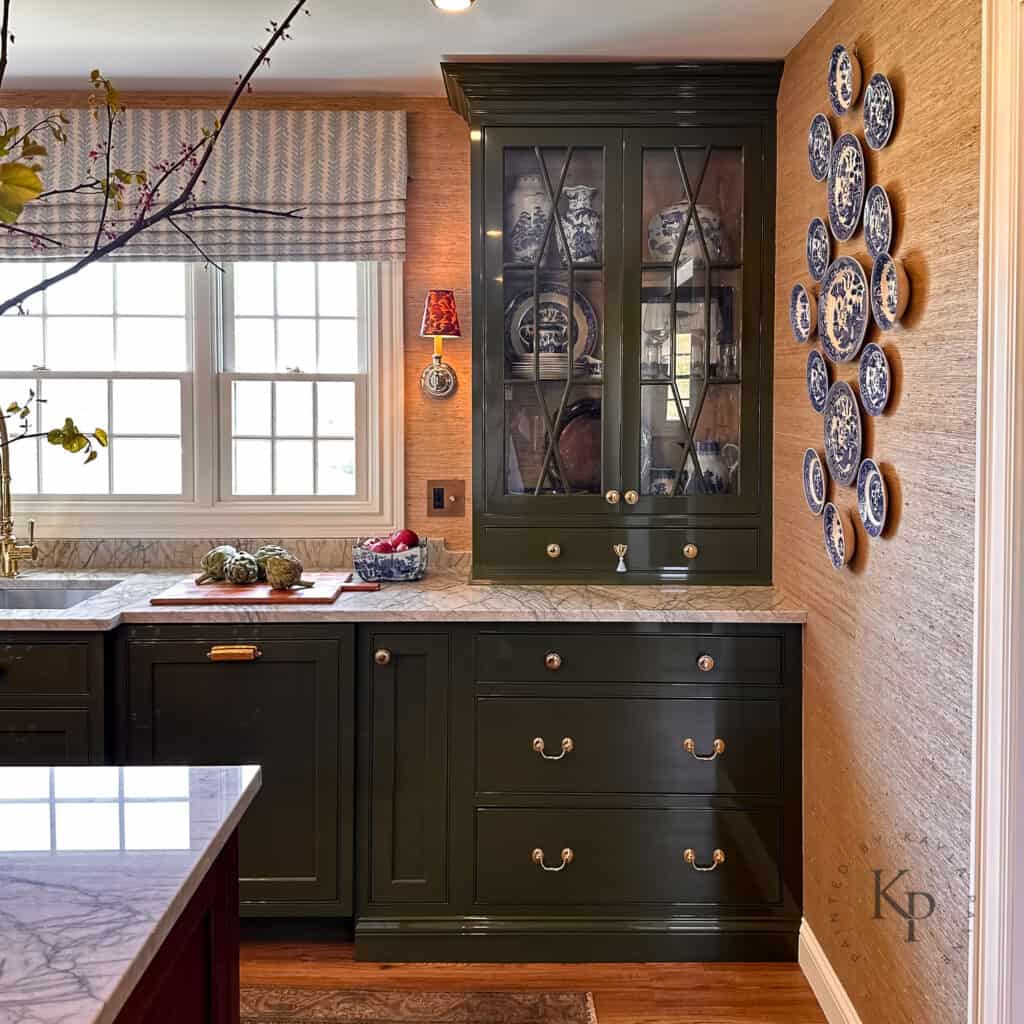
The cabinet pictured below was my favorite. Cabinet Joint was able to make this custom fretwork design based on a photo I submitted to them.
To be honest, I never intended to install the cabinetry myself. I wanted to hire a professional cabinet maker or carpenter to install the cabinets after I assembled them.
But all 4 of the tradesmen I contacted didn’t have time to do our job. So reluctantly, we decided to DIY the installation. Luckily my dad has quite a bit of finish carpentry experience and was willing to help me.
In hindsight, I can confidently say that my husband and I could have installed these ourselves…but I’m very happy that we didn’t have to. Having someone with past woodworking experience was SO helpful.
Assembling RTA cabinets is very simple – Installing cabinets is not quite as simple. The installation is not a beginner DIY project. I say it’s for an advanced DIY’er.
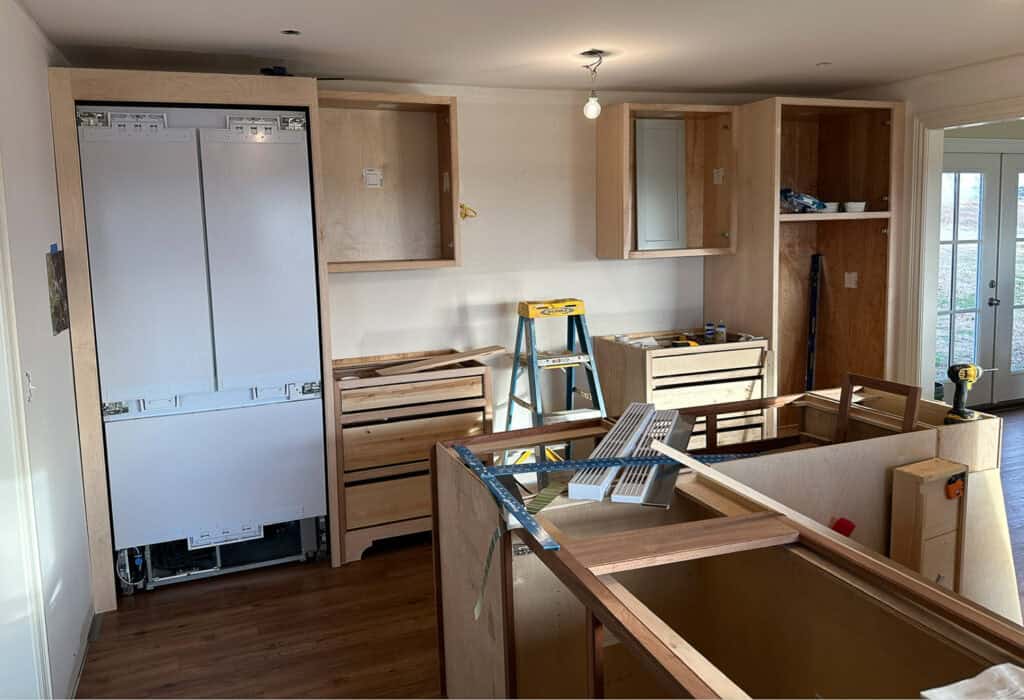

Installing the crown molding was the most challenging part for me. It was the first time I’d attempted crown molding, and our ceilings are very much not square or level.
Watch Episode 2 of our kitchen renovation here!
DIY Painting Our RTA Cabinets
Well, I did paint the cabinets myself, but calling it DIY doesn’t quite fit because I’m not a newbie. I’ve been professionally painting cabinets for over 10 years.
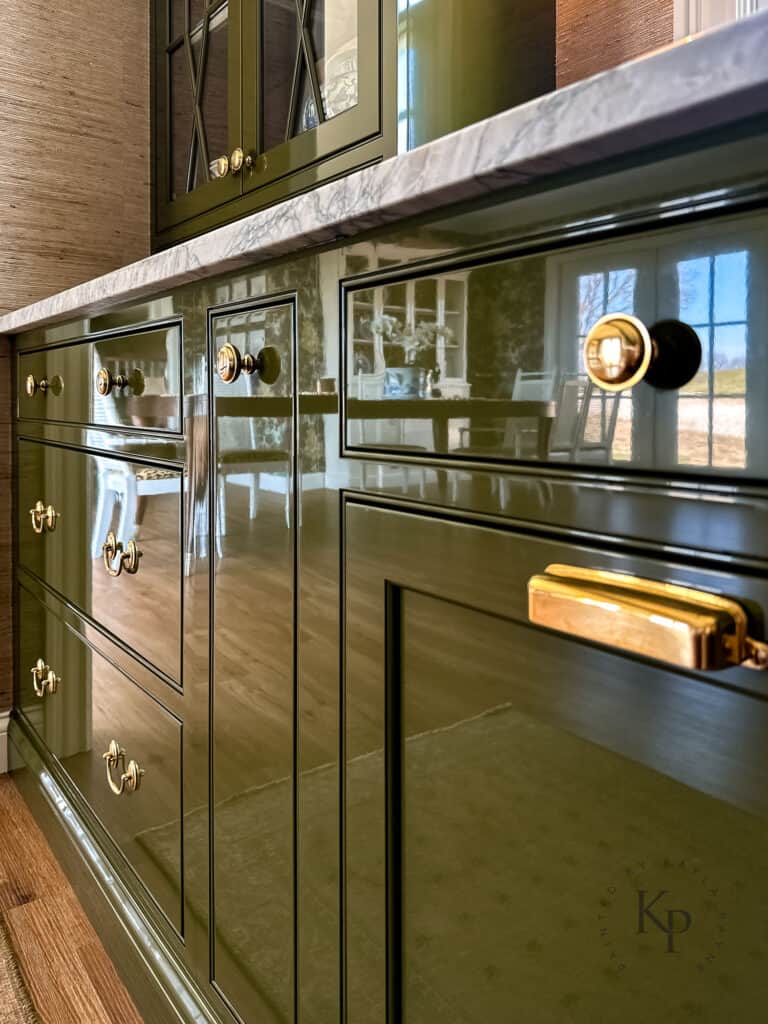
I wanted a high-gloss paint finish for my cabinets. To achieve this look I used Fine Paints of Europe Hollandlac Brilliant – which is a high-gloss oil enamel.
This paint finish required expert-level skill and a serious amount of patience. It took me a total of 6 weeks from start to finish.
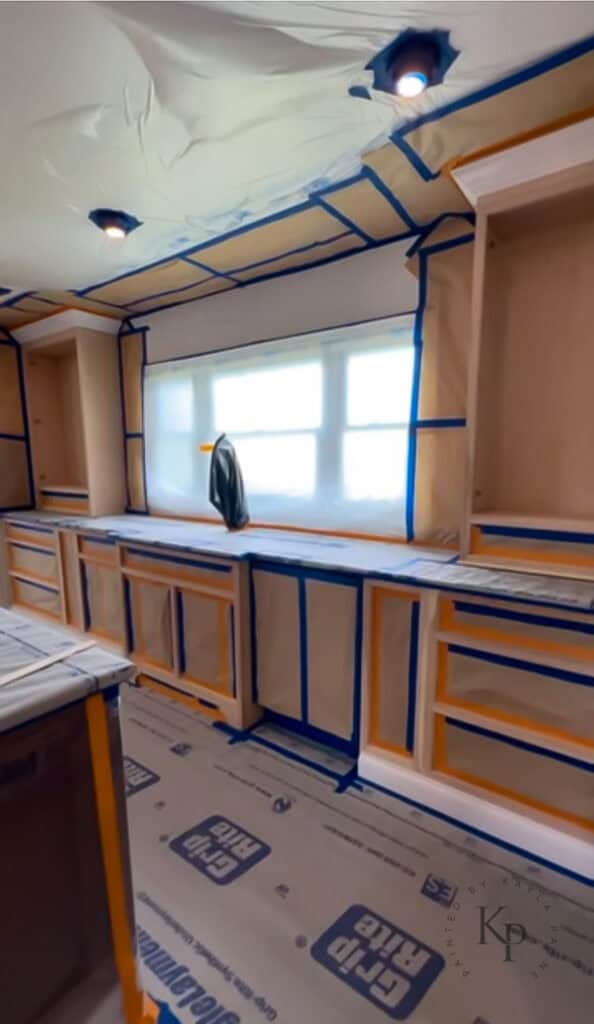
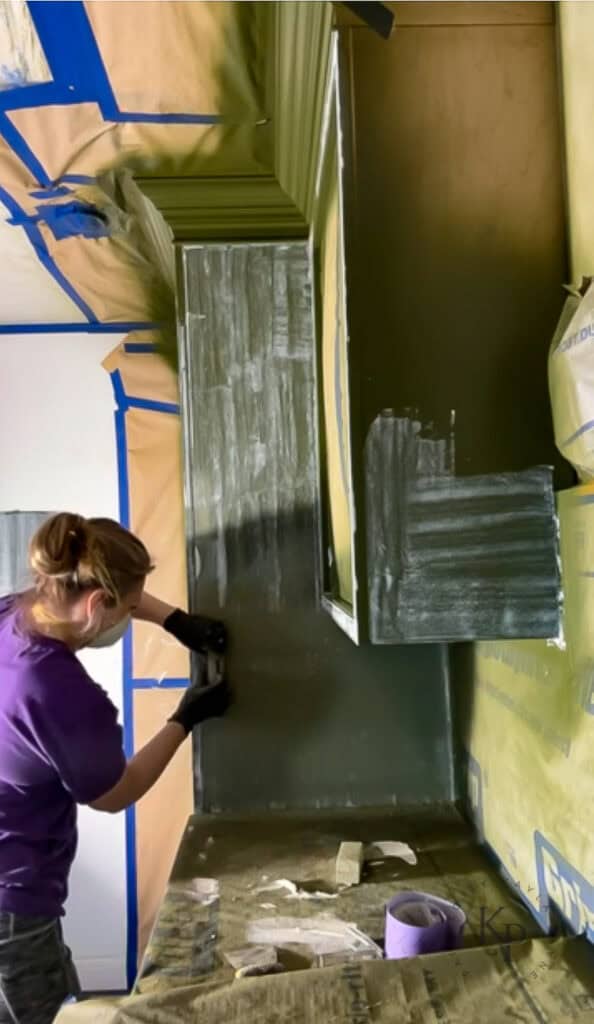
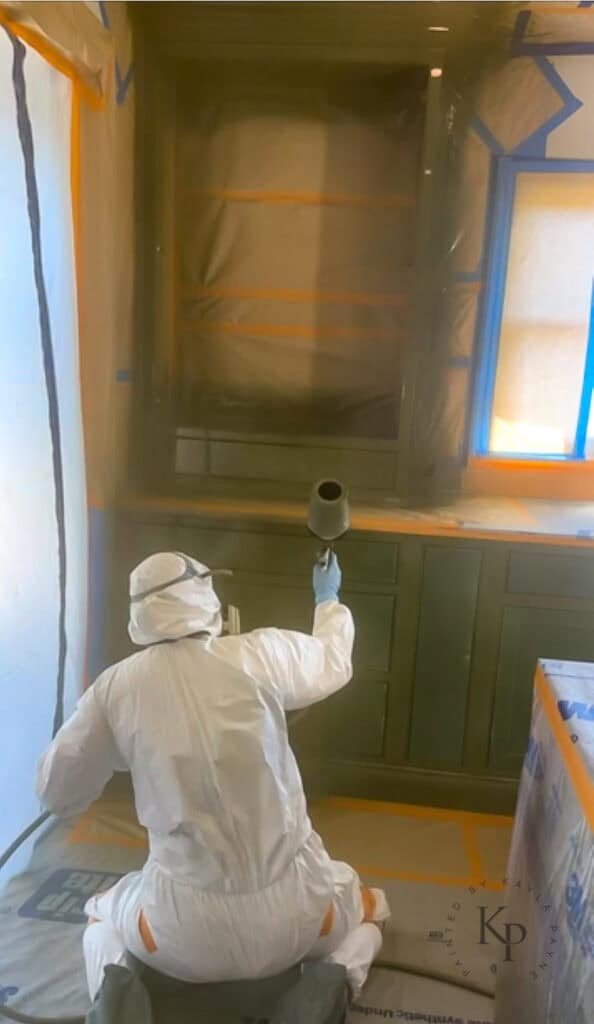
Prepping to paint
I went to great lengths prepping the kitchen in order to spray the cabinets on site. I covered the floors and countertops using shingle underlayment.
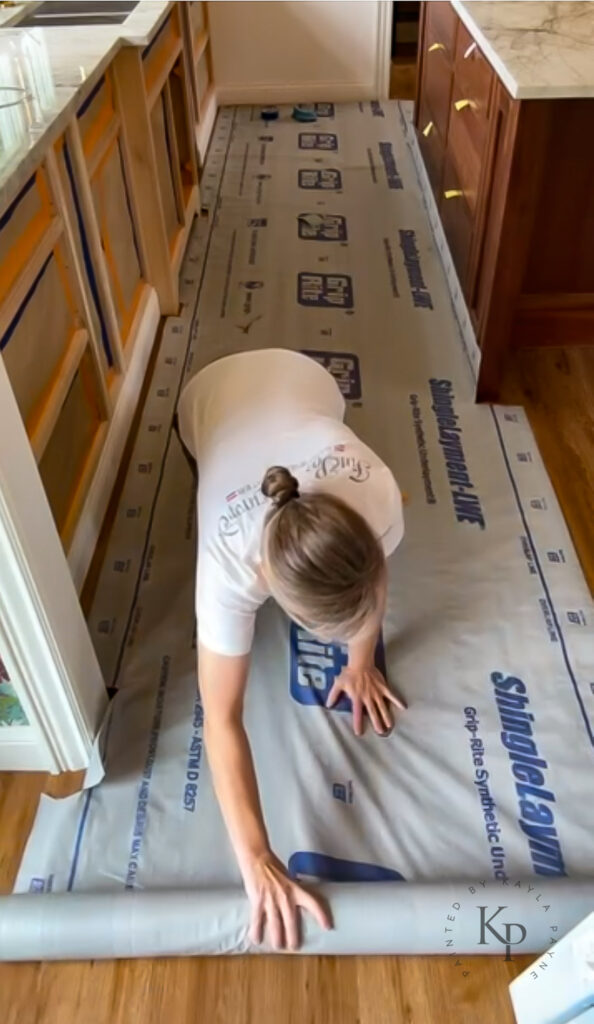
I masked every single thing in the kitchen that I didn’t want paint overspray to get onto.
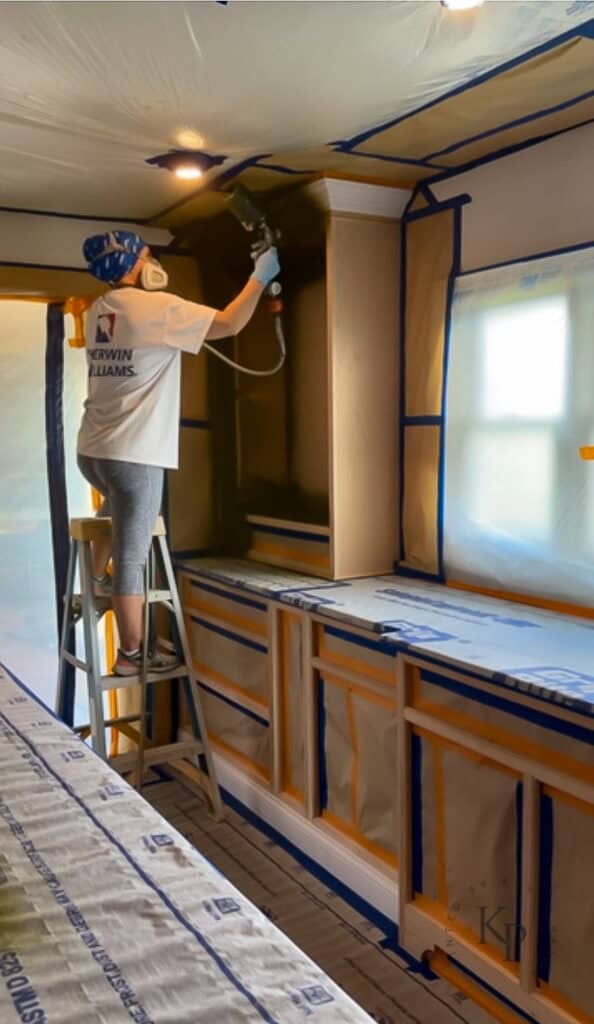
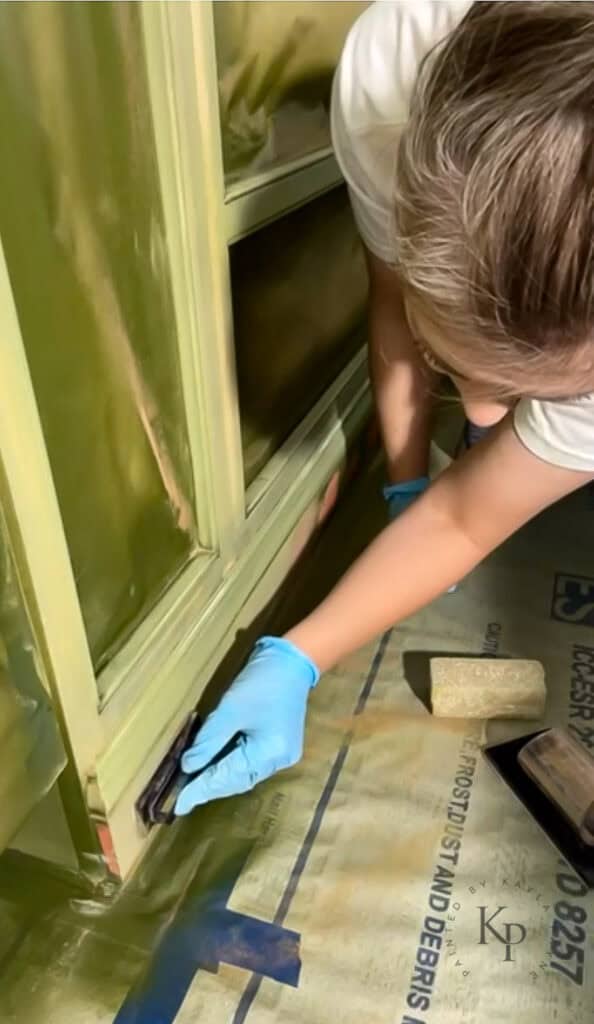
All of the priming
The priming part of the process took the longest by far. I primed a total of 3 times. In between those 3 coats of primer, I fully sanded every inch of the surface.
The priming schedule looked like this:
- Sprayed oil prime coat 1 (my primer was tinted to dark green)
- Skimmed imperfections with Bondo
- Sanded with 180
- Vacuumed/cleaned everything
- Sprayed oil prime coat 2
- Skimmed surface with Swedish Putty
- Sanded with 220
- Vacuumed/cleaned everything
- Sprayed oil prime coat 3
- Sanded with 500
- Vacuumed/cleaned
- Unmasked then Re-masked entire room
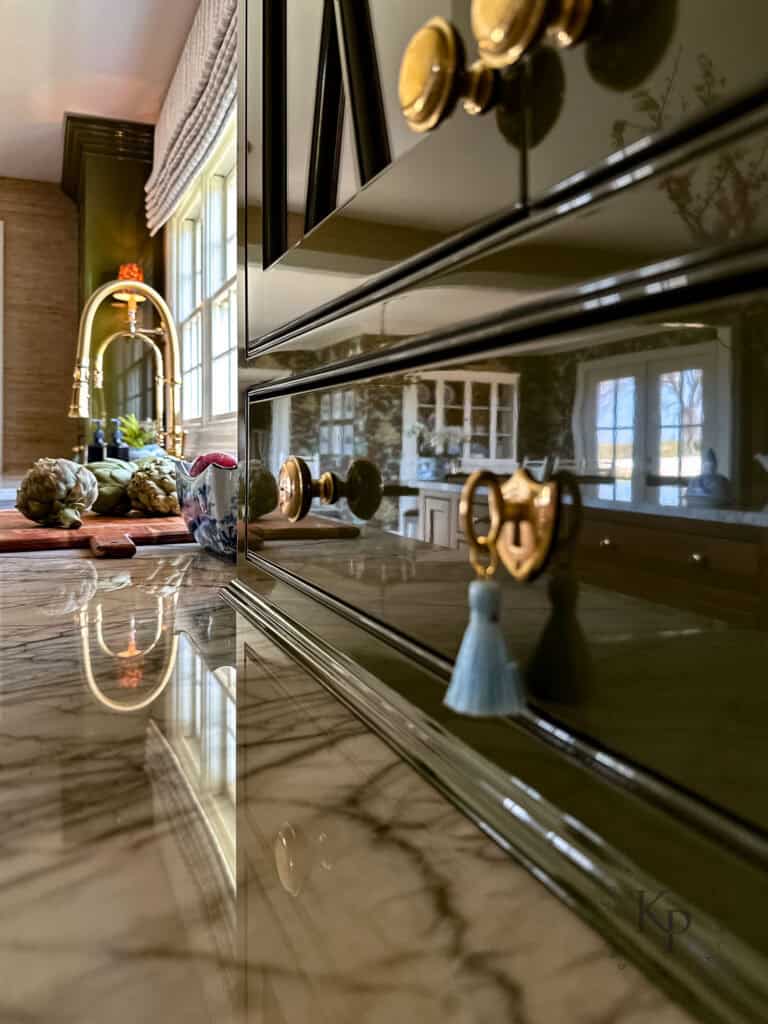
Painting the cabinets in high gloss
After weeks of priming and sanding (so, so much sanding) it was finally time to paint. I used Fine Paints of Europe Hollandlac Brilliant 98 in a custom mixed color. Below is the exact color formula I mixed for my cabinets.

After I sprayed the first coat of paint, I allowed it to dry for 48 hours. Then, I sanded the entire surface using 500 grit sanding pads. Next, I had to fully clean the cabinets and the entire room one final time. And finally, I sprayed the second and final coat of paint.
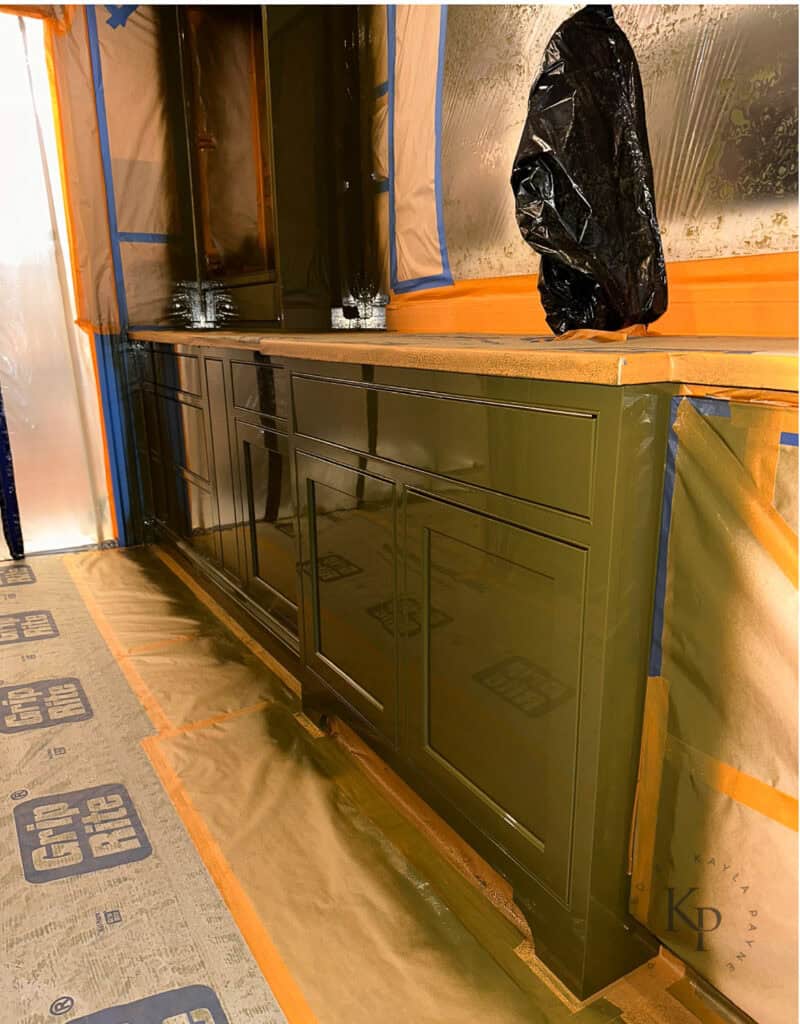

I was SO HAPPY to have the painting behind me. I cannot even tell you how elated I was to finish that monster project. It was so stressful.
Watch Episode 3 of our kitchen renovation here!
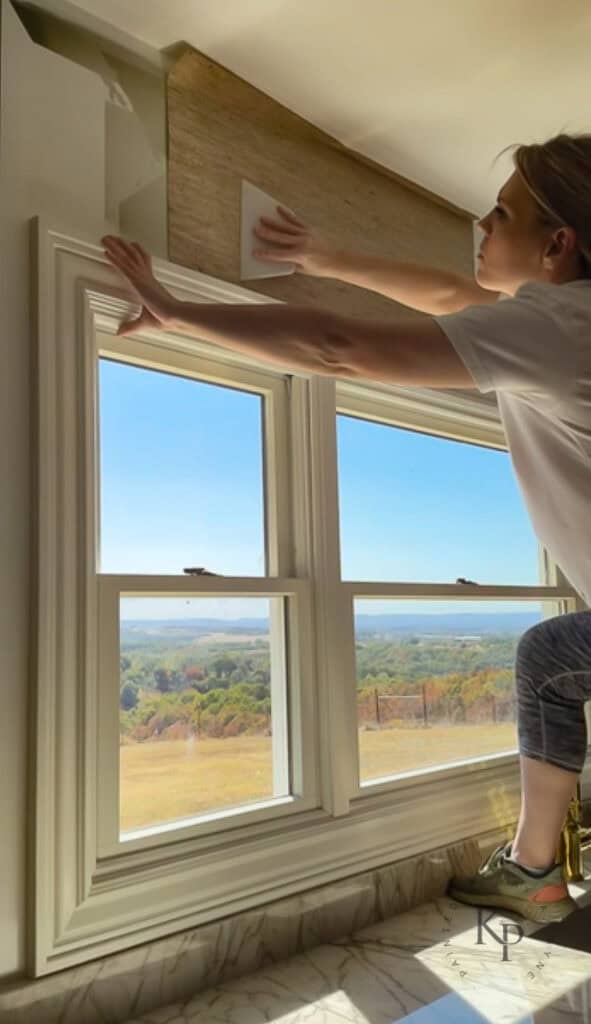
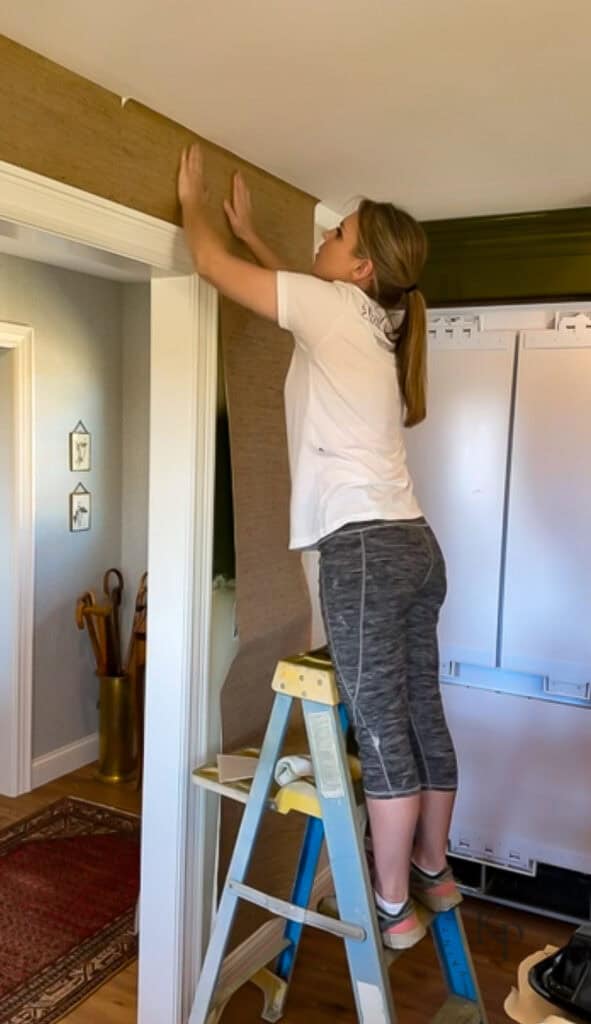
Wallpapering The Walls
After the cabinets were painted, I moved onto installing the grasscloth on the walls. This is when the space really started to take shape!
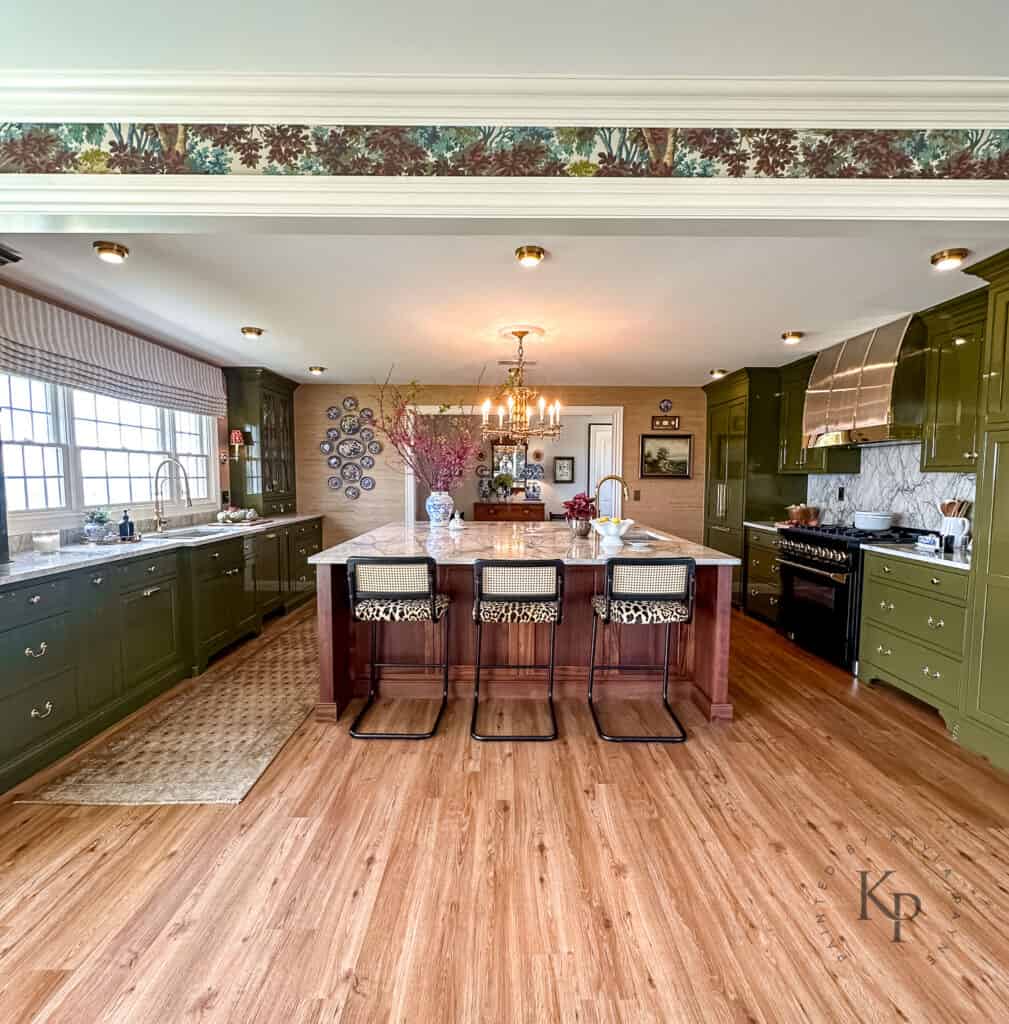
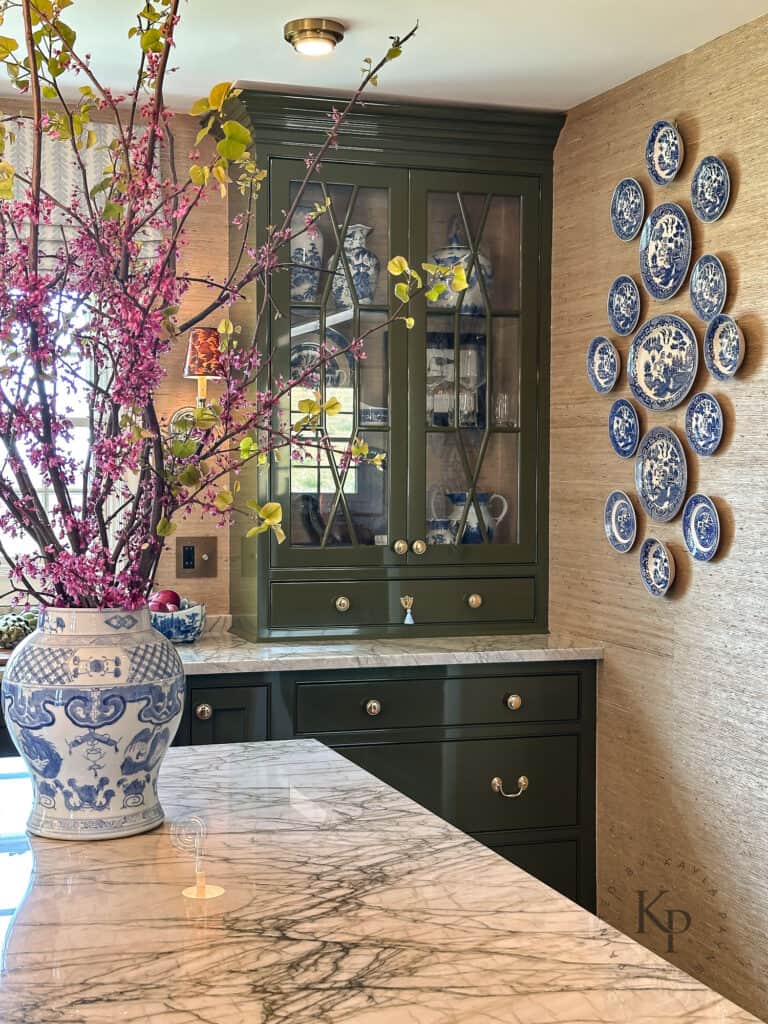
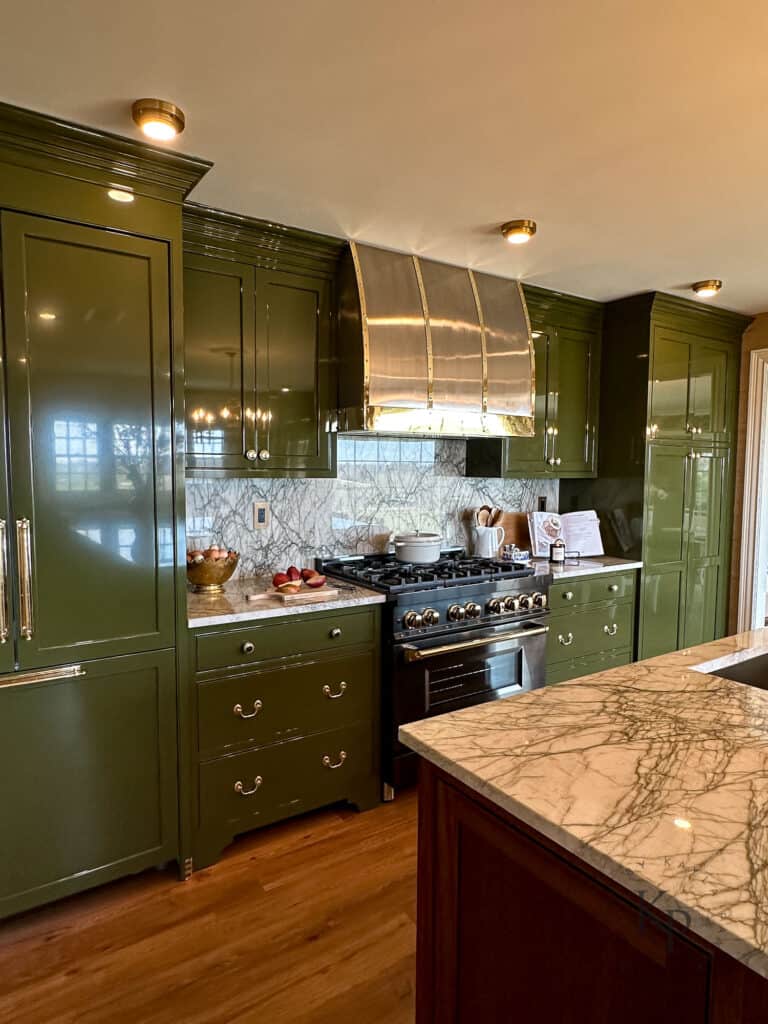
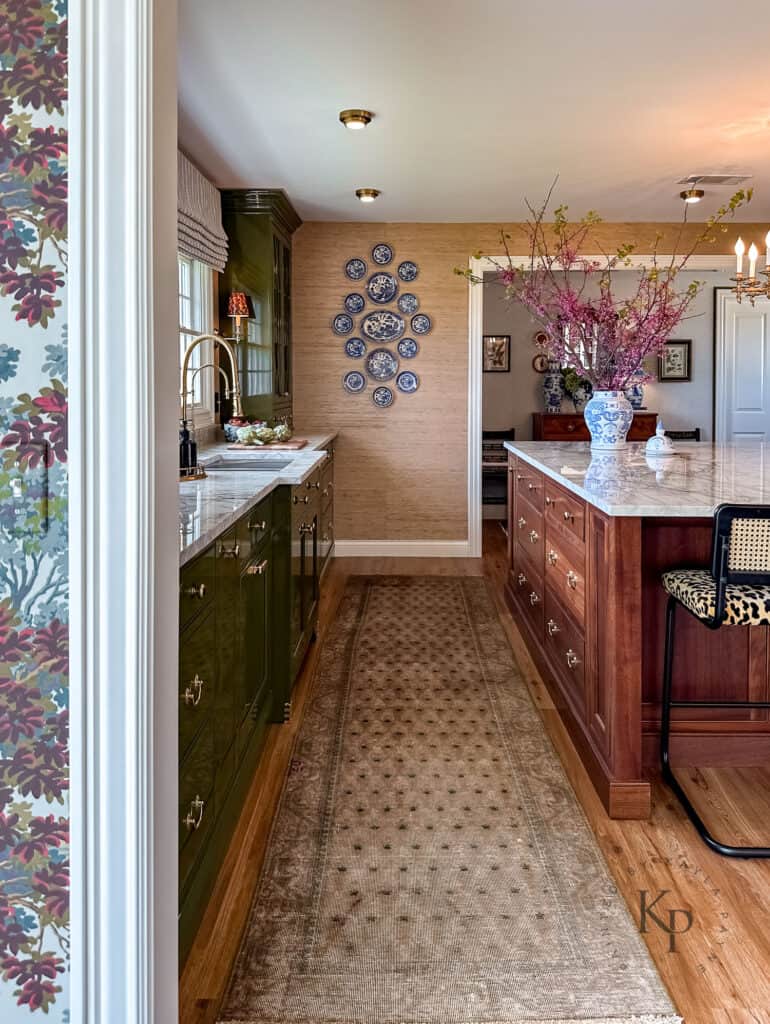
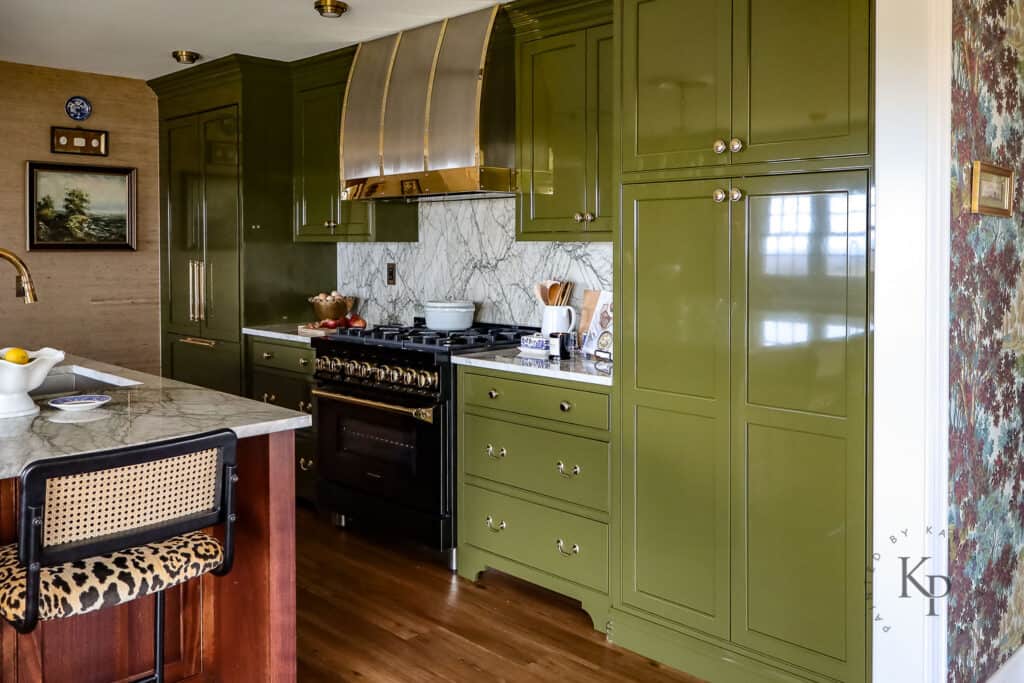
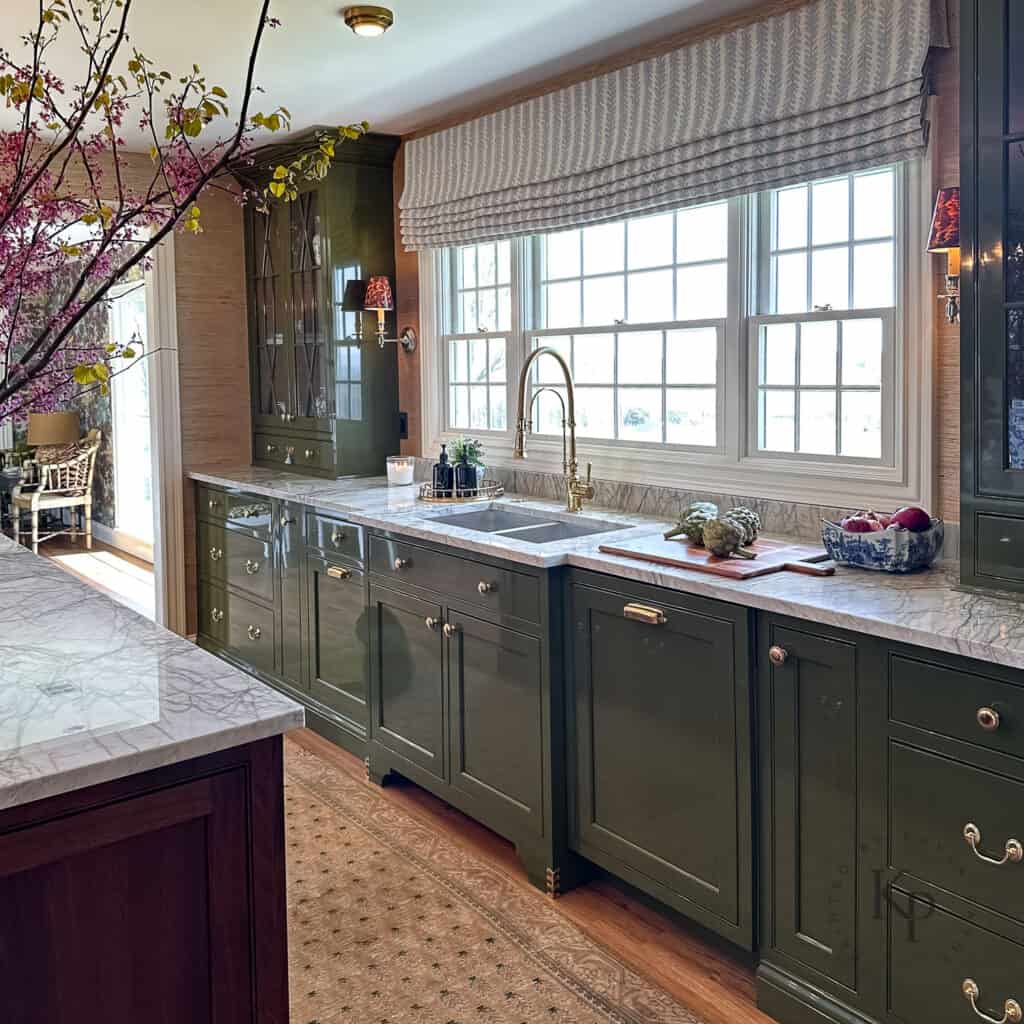
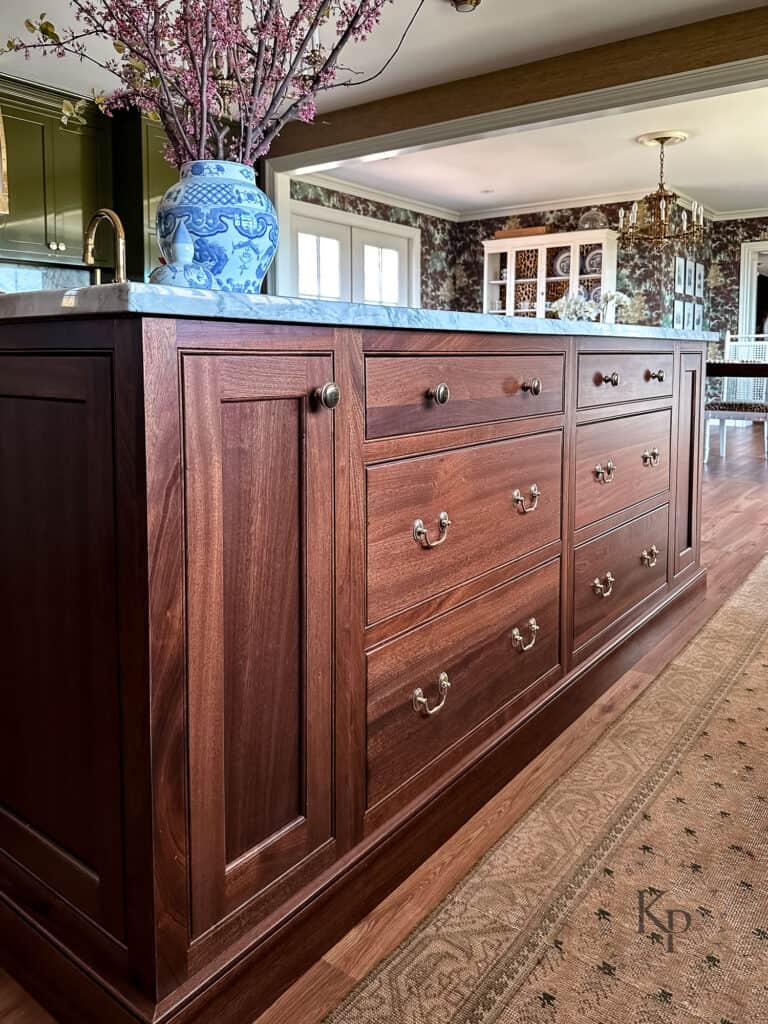
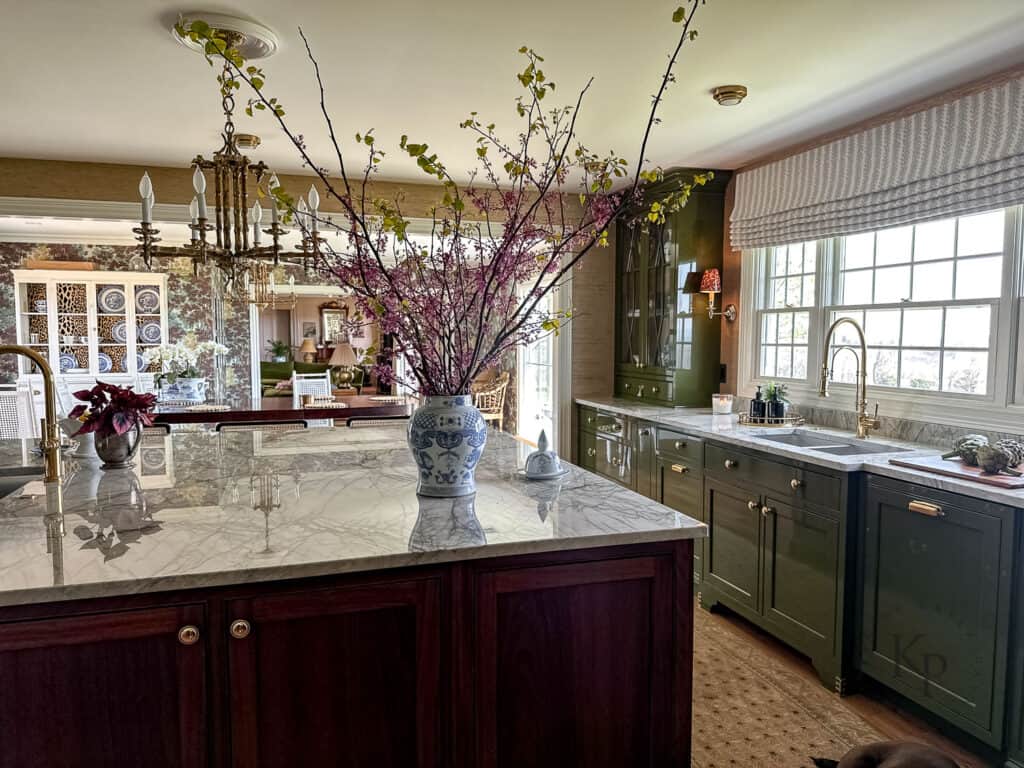
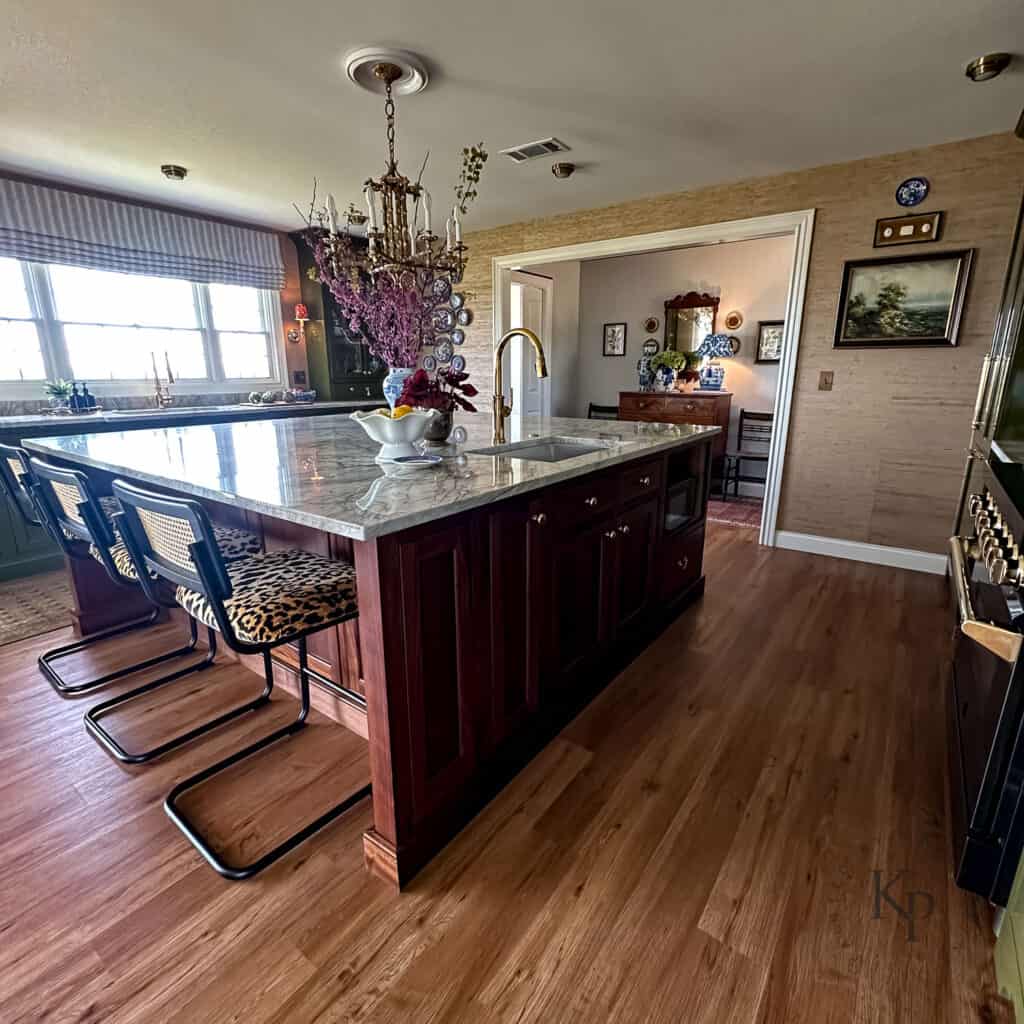
The Final Reveal!
The journey was long and difficult, full of ups, downs and delays upon delays, but I’m SO thrilled with the end result! I hope you’ll enjoy it too.

Watch Episode 4 of our kitchen renovation here!
Before & After
Links and Sources
Painted Cabinets – Cabinet Joint Door style: TW10 in 5 piece MDF (very pleased with doing MDF!) MDF Slab drawer fronts. Beaded flush inset frames in solid Maple.
Island Cabinet details – Solid Natural Mahogany – TW-10 door with solid slab drawer fronts. I used Minwax stain in Special Walnut.
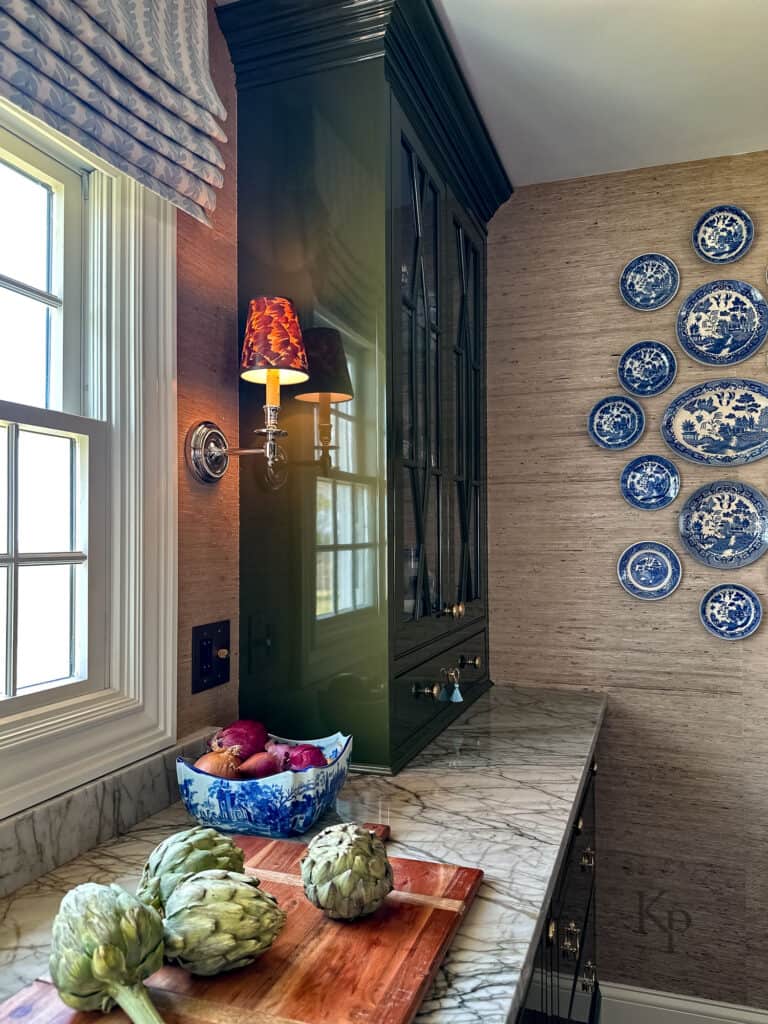
Kitchen Grasscloth Wallpaper – Thibaut Maranta Arrowroot in Beige
Dining Room Wallpaper – Bunny Williams for Lee Jofa Woodland in Multi
Countertops – Spiderweb Quartzite
Bar stools I recovered the seats using this leopard velvet fabric
Brass Cabinet Knobs – Alno 1 1/2″ unlacquered brass
Brass bail pulls on drawers – Classic Brass 3″ Hutter Collection Polished brass no lacquer
Brass Cup pulls – Classic Brass 5″ Hutter cup pull in polished brass no lacquer
Fridge Appliance Pulls – 12″ Campaign Pulls in unlacquered brass (code PAINTED1010 for discount)
Crest Keyhole Escutcheon – It looks like the exact one I have might not be available, but this is similar.
Chandelier over island – I found this on ebay. It’s vintage, likely from the 1960’s. At the time I’m writing this post (May 2025), this one is available on ebay. I used the search terms “vintage brass faux bamboo chandelier” to find it as there are no manufacturer details that I’m aware of.
Small Ceiling Lights – Porte 5.5″ Flush Mount
Wall sconces – French single wall sconce
Wall sconce shades – Faux Tortoise Shell lampshade
Roman Window Shade – I made the shade using Woodperry fabric in blue from Decorator’s Best (gifted)
Runner – I bought this vintage rug off of eBay. My favorite eBay rug dealer is HGallery. I have 7 rugs from his shop so far.
Range Hood – Custom fabricated locally. Brushed stainless steel with polished brass strapping.
Range – 36″ ZLINE Autograph in Black stainless steel with polished gold accents. Read my review of ZLINE appliances in this post.
Brass outlet covers and light switches – Code KAYLA10 for discount
Flooring – Purchased locally, but this is the exact product.
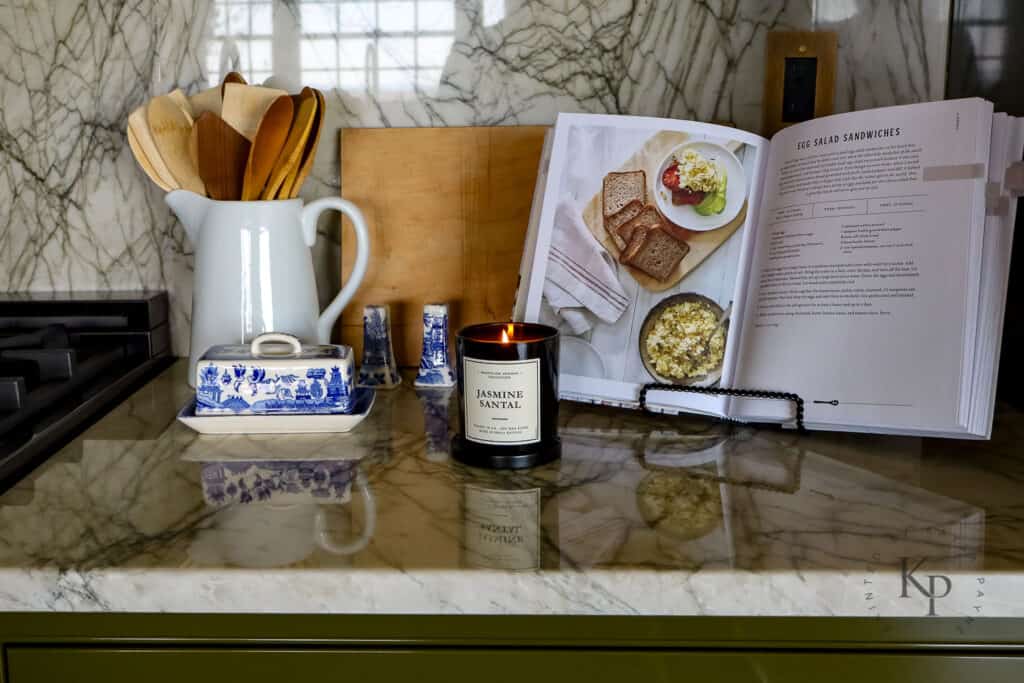
Artwork, plates and other decor items were all purchased second-hand from flea markets, antique shops and thrift stores.
If you see something that’s not sourced, feel free to leave me a comment or send an email. I’ll do my best to link or get the source for you!
Thank you so much for touring my kitchen with me!
Until next time,
xo Kayla
It’s beautiful! You really are amazing and such an inspiration!
Thank you, Ann xo
what an outstanding transformation! Just lovely in every way!
Thank you, Mary!
Your kitchen turned out so good! I would love to do a big kitchen renovation like this, but I know I’m not an advanced DIY’er, so I won’t be doing new cabinets. The wallpaper combined with the new cabinet color, really transforms the look of the room. I wasn’t originally considering doing green, but now I’m wondering if I should. Thanks so much for sharing!
Thank you so much!